只要配置一下 hostname 属性就可以
Vagrant.configure("2") do |config|
  config.vm.box = "centos/7"
  config.vm.hostname = "oracle"
end
只要配置一下 hostname 属性就可以
Vagrant.configure("2") do |config|
config.vm.box = "centos/7"
config.vm.hostname = "oracle"
end
先从 https://github.com/k3s-io/k3s/releases 下载 k3s 命令与 k3s-airgap-images-amd64.tar 离线包
wget https://github.com/k3s-io/k3s/releases/download/v1.23.3%2Bk3s1/k3s
wget https://github.com/k3s-io/k3s/releases/download/v1.23.3%2Bk3s1/k3s-airgap-images-amd64.tar
curl -o install.sh https://get.k3s.io
sudo chmod +x k3s
sudo chmod +x install.sh
安装必要的系统环境
sudo yum install -y container-selinux
sudo yum install -y https://rpm.rancher.io/k3s/stable/common/centos/7/noarch/k3s-selinux-0.4-1.el7.noarch.rpm
然后就可以开始准备安装
sudo mkdir -p /var/lib/rancher/k3s/agent/images/
sudo cp k3s-airgap-images-amd64.tar /var/lib/rancher/k3s/agent/images/
sudo cp k3s /usr/local/bin/
INSTALL_K3S_SKIP_DOWNLOAD=true ./install.sh
mkdir /data -m 777
vi /etc/exports
/data *(rw,insecure,no_root_squash)
service nfs restart
curl -sfL https://get.k3s.io | sh -s - --kube-apiserver-arg "feature-gates=RemoveSelfLink=false"
如果实现已经安装过,需要手动修改启动文件
ExecStart=/usr/local/bin/k3s \
    server \
	'--kube-apiserver-arg' \
	'feature-gates=RemoveSelfLink=false' \
https://github.com/helm/helm/releases
curl -O https://get.helm.sh/helm-v3.8.0-linux-amd64.tar.gz
tar zxvf helm-v3.8.0-linux-amd64.tar.gz
mv linux-amd64/helm /usr/local/bin/
export KUBECONFIG=/etc/rancher/k3s/k3s.yaml
helm repo add moikot https://moikot.github.io/helm-charts
helm -n kube-system install nfs-client-provisioner moikot/nfs-client-provisioner --version 1.3.0 --set nfs.server=192.168.57.11 --set nfs.path=/data
helm repo add bitnami https://charts.bitnami.com/bitnami
helm install redis bitnami/redis --set global.storageClass=nfs-client

brew install android-platform-tools
安装后即可执行 adb 命令
$ adb devices
* daemon not running; starting now at tcp:5037
* daemon started successfully
List of devices attached
brew install seafile-client
curl -sfL https://get.k3s.io | sh -[INFO] Finding release for channel stable
[INFO] Using v1.22.5+k3s1 as release
[INFO] Downloading hash https://github.com/k3s-io/k3s/releases/download/v1.22.5+k3s1/sha256sum-amd64.txt
[INFO] Downloading binary https://github.com/k3s-io/k3s/releases/download/v1.22.5+k3s1/k3s
[INFO] Verifying binary download
[INFO] Installing k3s to /usr/local/bin/k3s
[INFO] Skipping installation of SELinux RPM
[INFO] Creating /usr/local/bin/kubectl symlink to k3s
[INFO] Creating /usr/local/bin/crictl symlink to k3s
[INFO] Creating /usr/local/bin/ctr symlink to k3s
[INFO] Creating killall script /usr/local/bin/k3s-killall.sh
[INFO] Creating uninstall script /usr/local/bin/k3s-uninstall.sh
[INFO] env: Creating environment file /etc/systemd/system/k3s.service.env
[INFO] systemd: Creating service file /etc/systemd/system/k3s.service
[INFO] systemd: Enabling k3s unit
Created symlink /etc/systemd/system/multi-user.target.wants/k3s.service → /etc/systemd/system/k3s.service.
[INFO] systemd: Starting k3s
EMQ X 其实就原来的 emqttd,emqttd 最后更新是 2018 年,最后的版本停留在 2.8,如果是新安装直接安装 emqx 就可以了,不用去管原来的 emqttd。
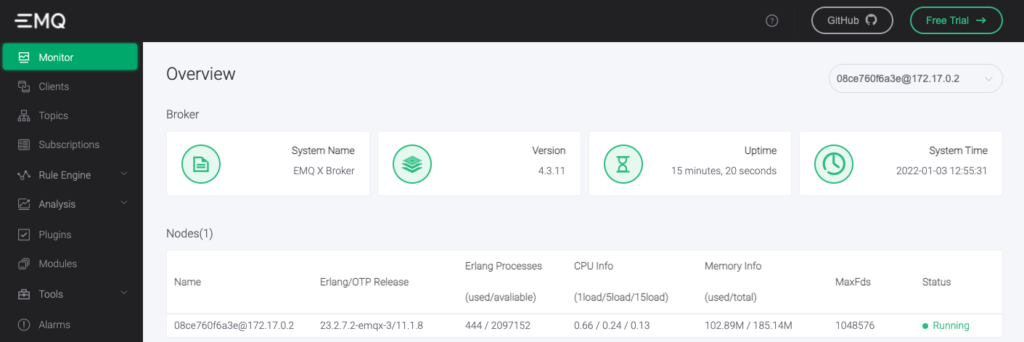
emqx 社区版的官网地址是:https://www.emqx.io/,最新版本是 4.3.11,我们直接使用 docker 将 4.3.11 的镜像拉下跑起来:
docker run -d --name emqx -p 1883:1883 -p 8081:8081 -p 8083:8083 -p 8883:8883 -p 8084:8084 -p 18083:18083 emqx/emqx:4.3.11
Unable to find image 'emqx/emqx:4.3.11' locally
4.3.11: Pulling from emqx/emqx
8572bc8fb8a3: Pull complete
f433d2ac3a81: Pull complete
c5fb4dda1215: Pull complete
36cce342db35: Pull complete
2589c0a3d802: Pull complete
3c6240d57787: Pull complete
4d4765da292a: Pull complete
Digest: sha256:10d94b1b3c5ac96535a8cc343a8cad9591c7437af4236d28098c4f562c1ef9d8
Status: Downloaded newer image for emqx/emqx:4.3.11
08ce760f6a3eadb98dd64e4d64c8c2c2ffeac0c1e59ea2bdcc0f33a9b59aae6f
然后打开浏览器访问 18083 端口:http://localhost:18083,使用默认用户名密码:admin/public 登录
